Agent Interface
Agent Work Flow
Worflow Stages
Step 1: Login & Setup
- Agent logs in
- Selects campaign (if applicable)
- Reviews environment
Step 2: Agent Becomes Available
- Agent sets status to Ready
- System includes agent in dialing pool
Step 3: Call Handling
- Dialer places calls automatically
- Agent receives call when connected
- Lead information is displayed
Step 4: Active Call Handling
- Agent interacts with customer
- Uses controls:
- Mute
- Hold
- Transfer
- Follows script / CRM
Step 5: Call Completion
- Call ends (agent or customer)
- System moves agent to Wrap-up
Step 6: Disposition & Data Capture
- Agent selects outcome
- Adds notes
- Schedules callback if needed
Step 7: Next Call Cycle
- Agent returns to:
- Ready (auto o manual)
- Next call is delivered
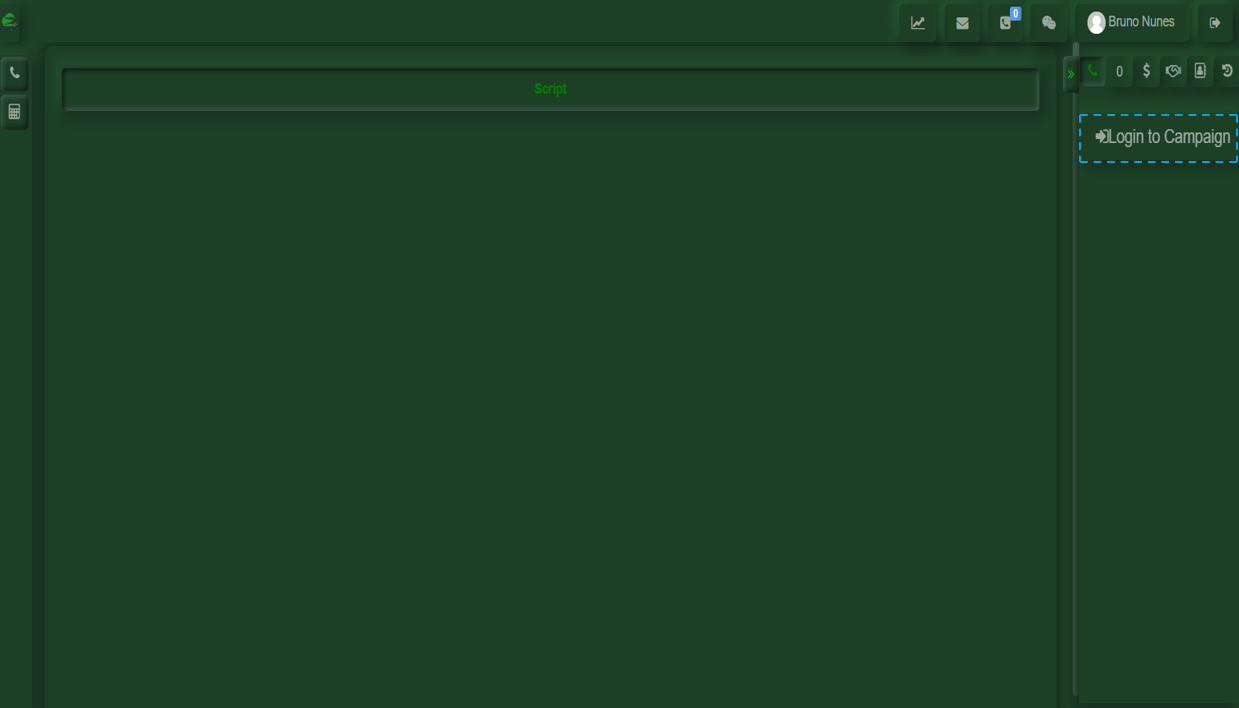
Login & Setup
After logging in, you will need to log into the campaign that has been previously assigned to you by a supervisor. If the assigned campaign is not correct, please notify your supervisor.
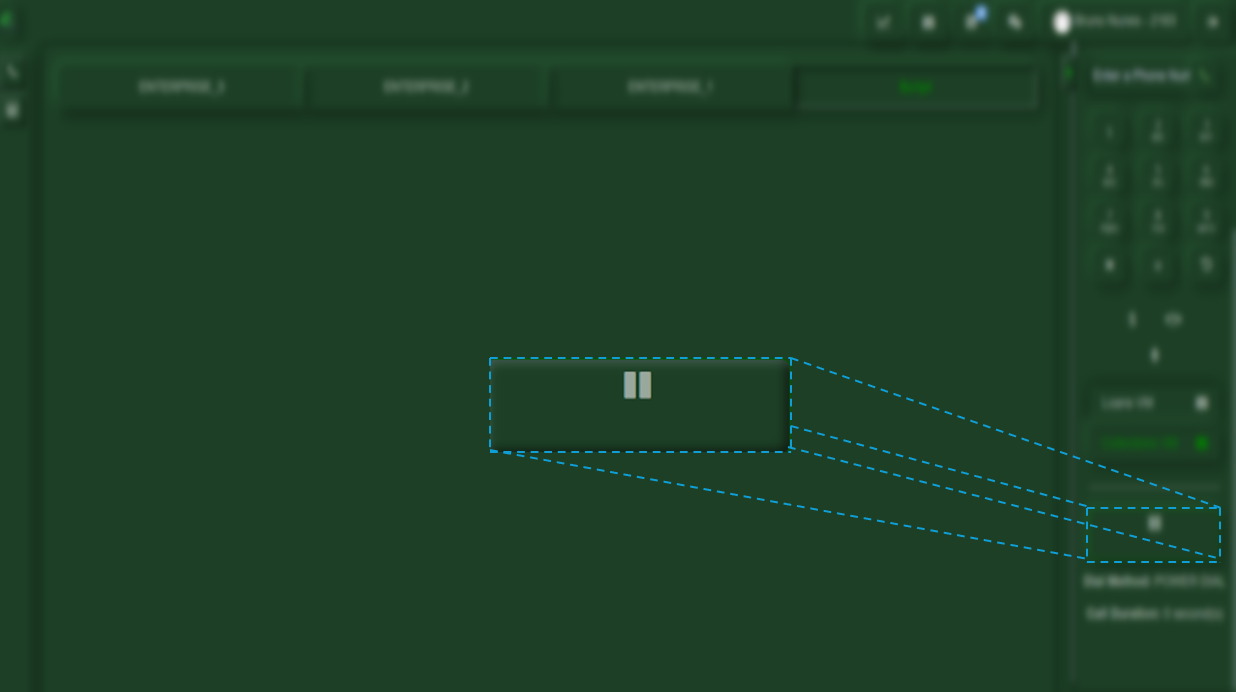
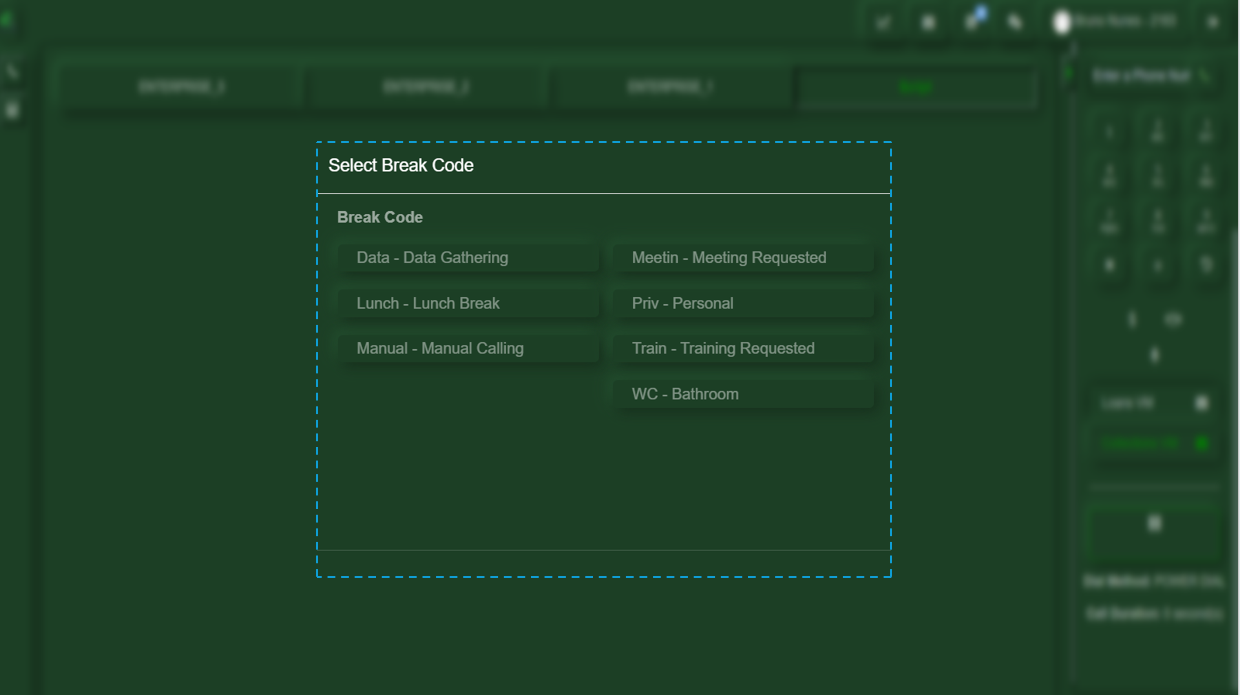
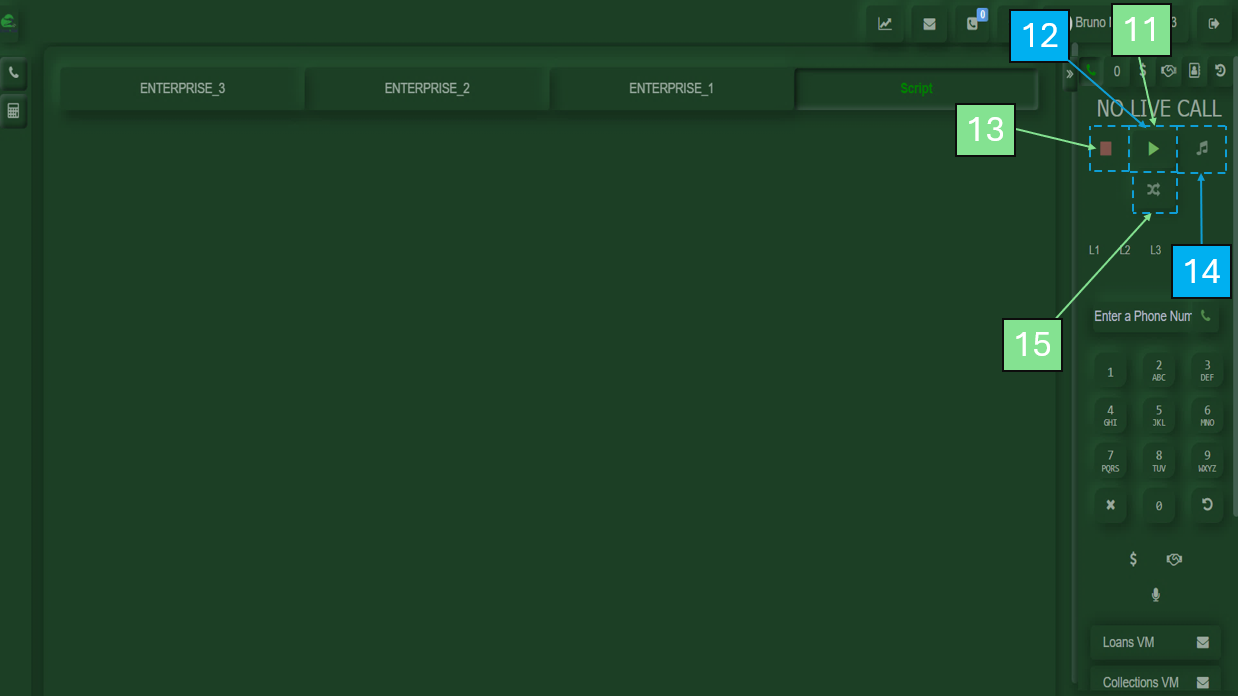
If you are ready to start receiving calls, you only need to press the Play button. If you need to pause for a break or any other reason that requires you to stop receiving calls, simply scroll down slightly on the screen and select the Pause button. Upon clicking it, a menu will appear where you must select the reason for your break.

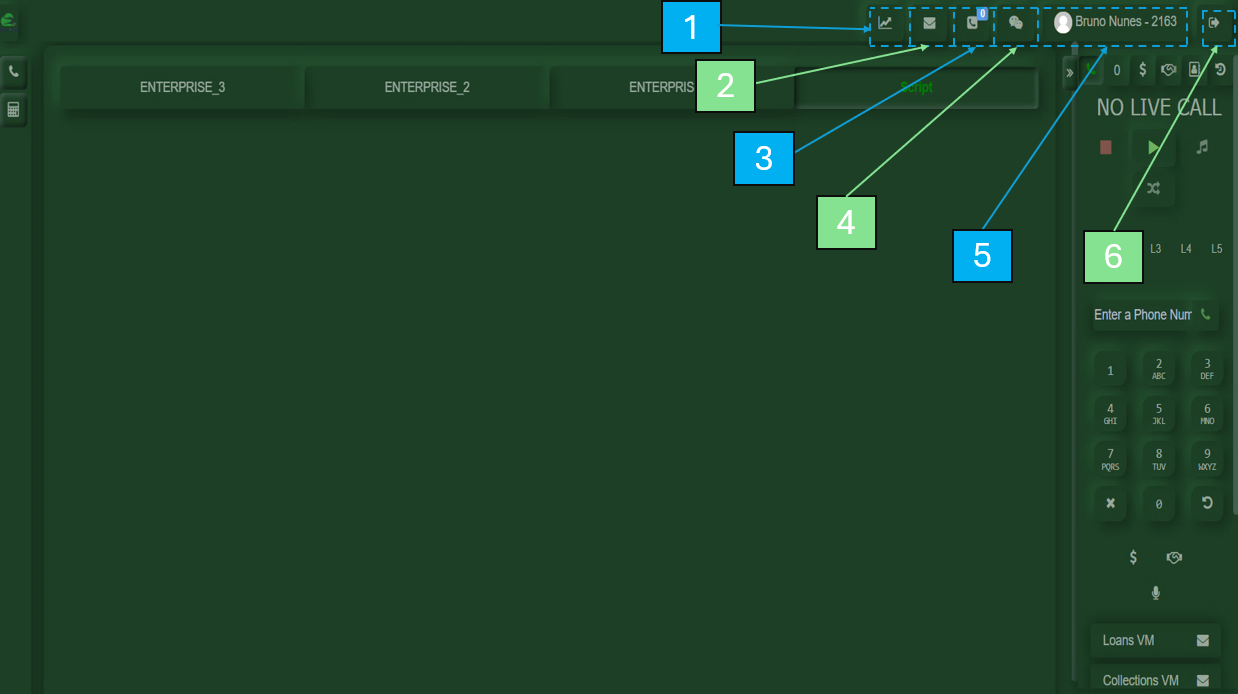
Status & Control Bar
Within the main user interface, you will find several available options:
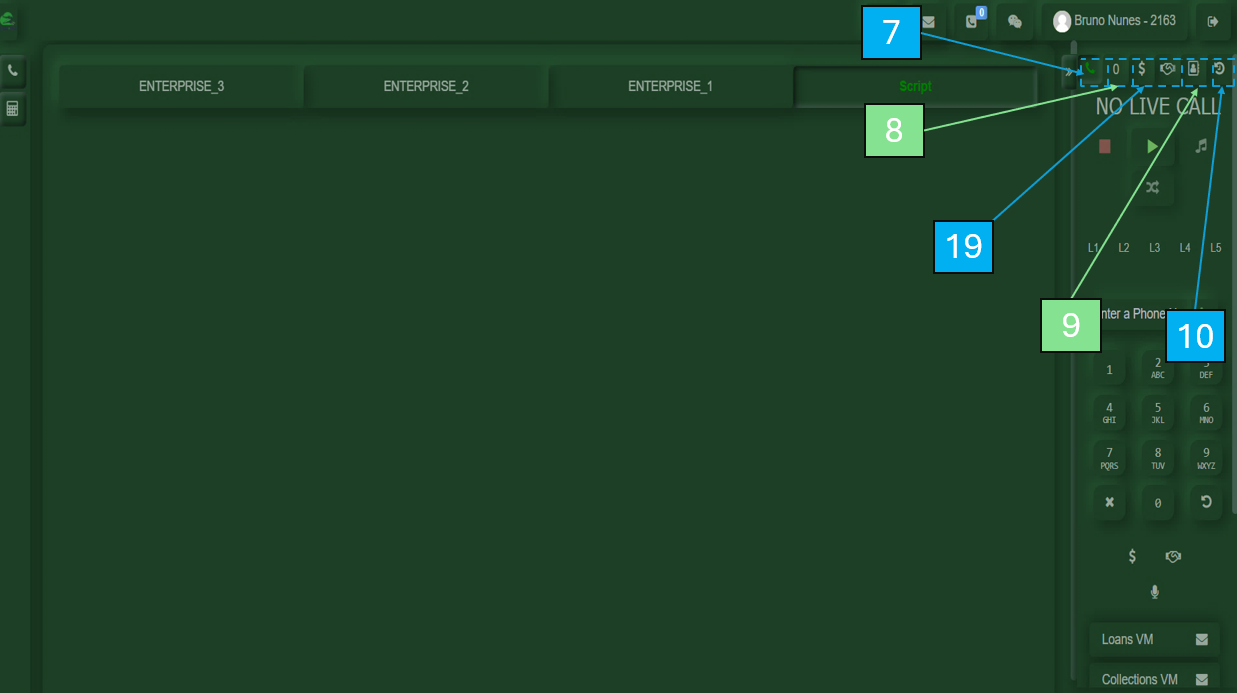
1.My Stats
Displays your activity metrics, including: First Activity, Last Activity, Login Time, Total Calls, Break, Pause, Available, and Talk time.
2.Voicemails
Shows the voicemail messages received in your account.
3.Callbacks
Displays calls returned by customers.
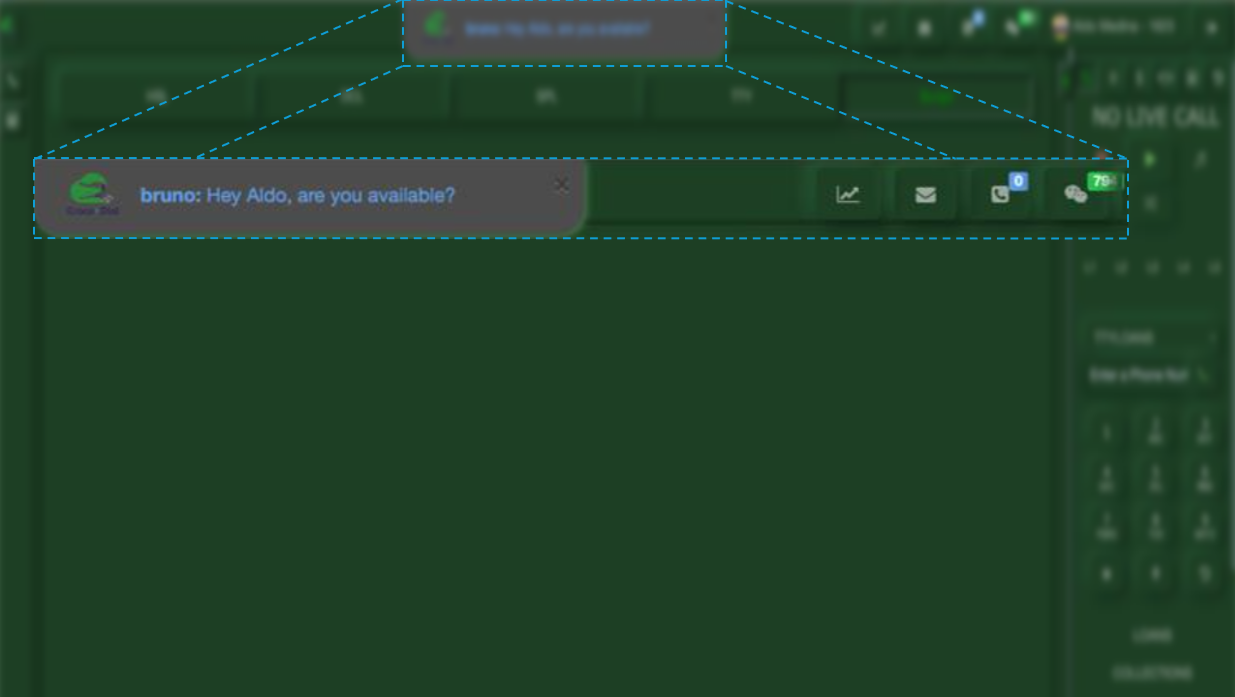
4.Chat
Your personal chat for communication.
5.My Profile
Allows you to view your name, interface color, and other personalization settings.
8.Call Queue
Displays customers waiting in line to be attended.
9.Phonebook
Contains a list of saved contact numbers for different needs.
10.Call History
Records all calls made, including the numbers dialed.
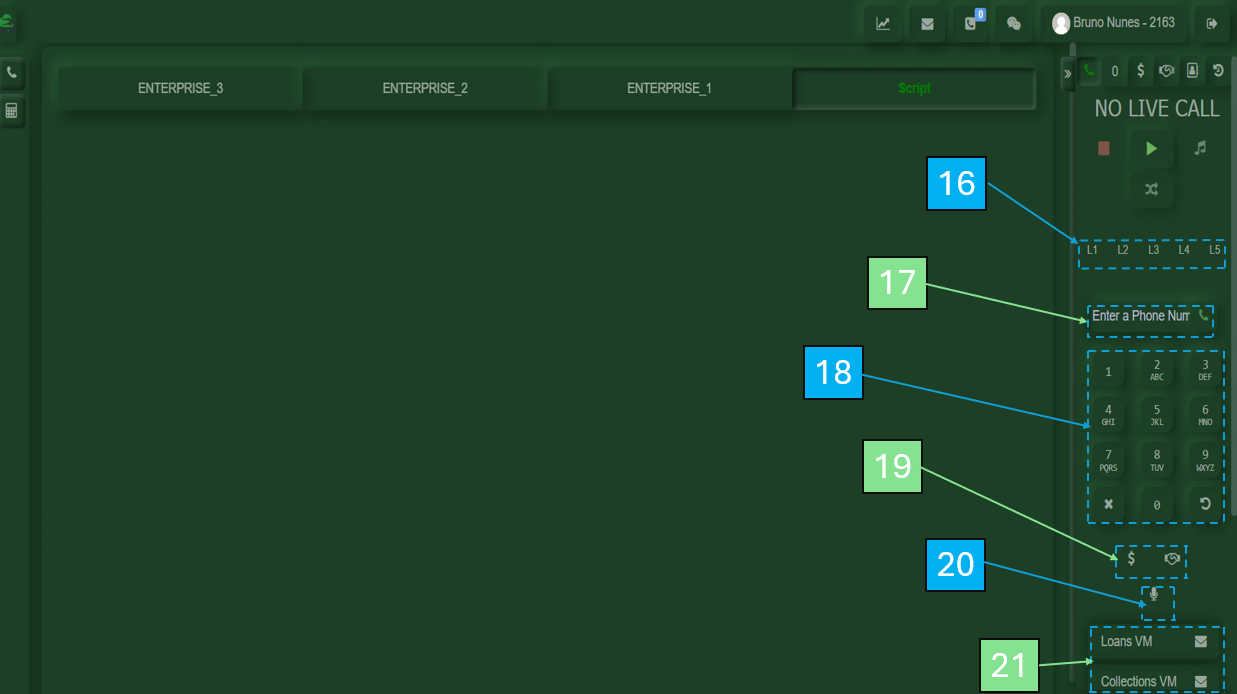
16.Call Line Management
Allows you to manage multiple call lines, including placing customers on hold while handling others.
17.Manual Call Option
Allows you to place a call by entering the customer’s number.
18.Dial Pad
Numeric keypad used for dialing.
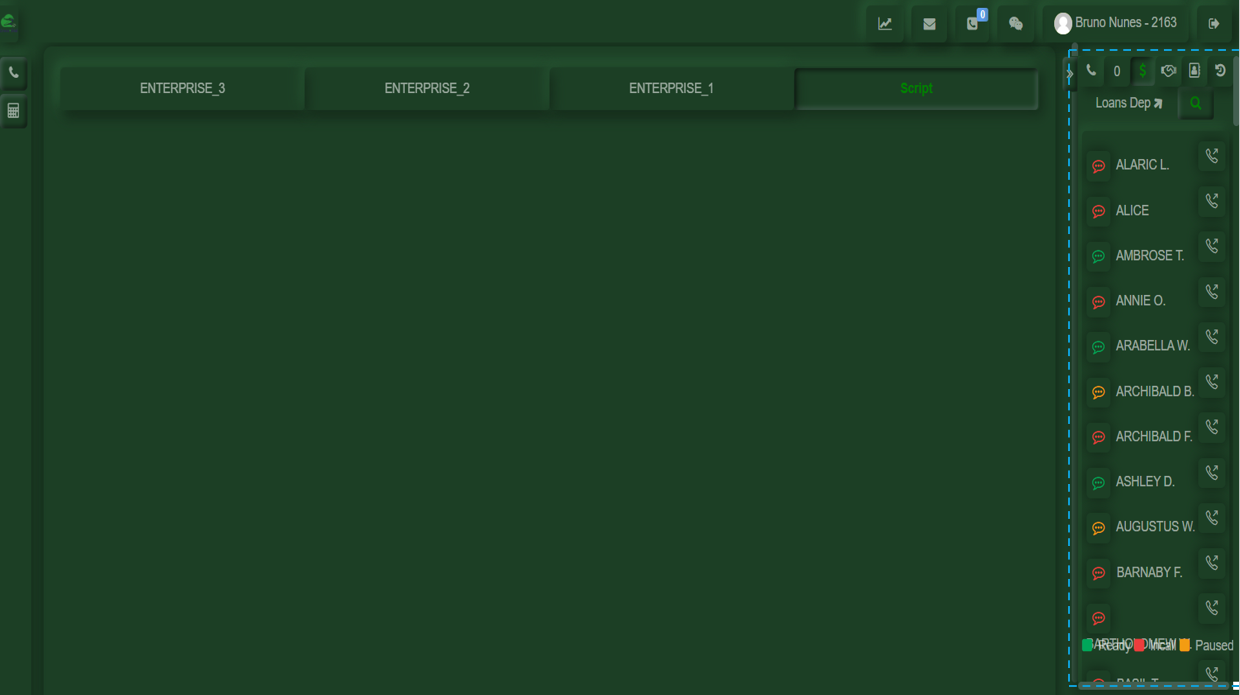
19.Call Transfer Buttons
Used to transfer calls to departments such as Loans or Collections. Also available at the top before initiating a call.
21.Voicemail Broadcast
A pre-recorded message sent to the customer’s voicemail.
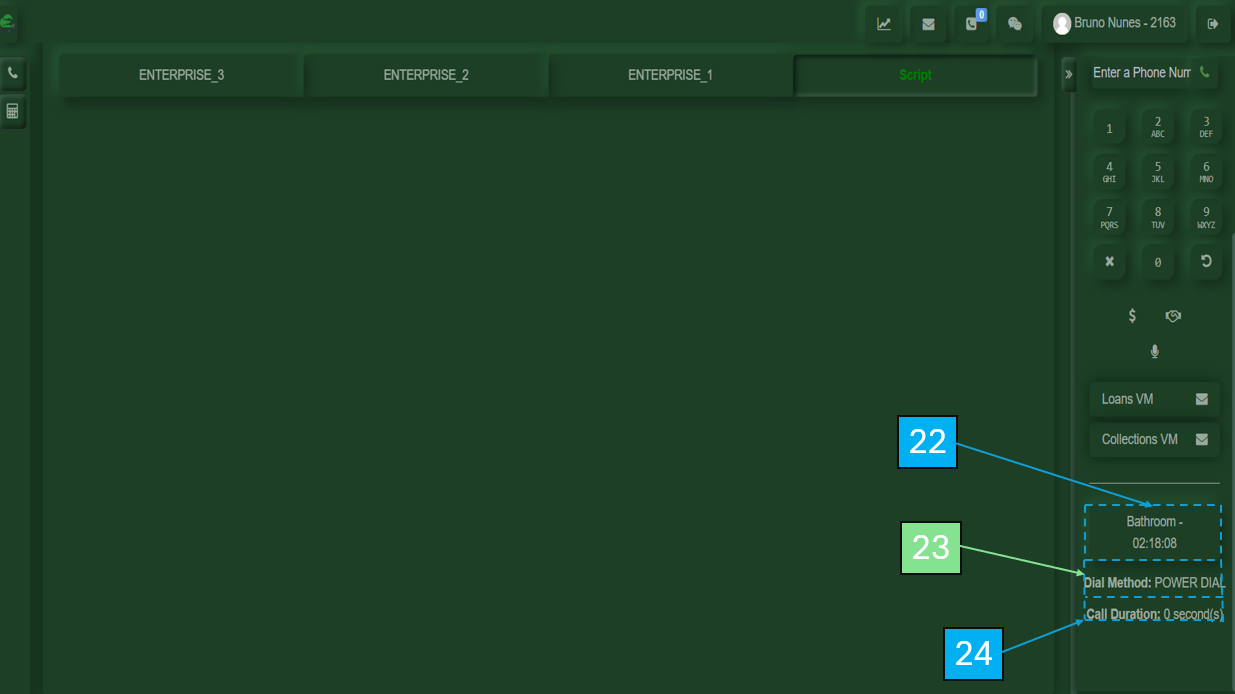
22.Break Time Indicator
Shows how long you have been on break.
23.Dial Method
Displays the current dialing method.
24.Call Duration
Shows the duration of the current call.
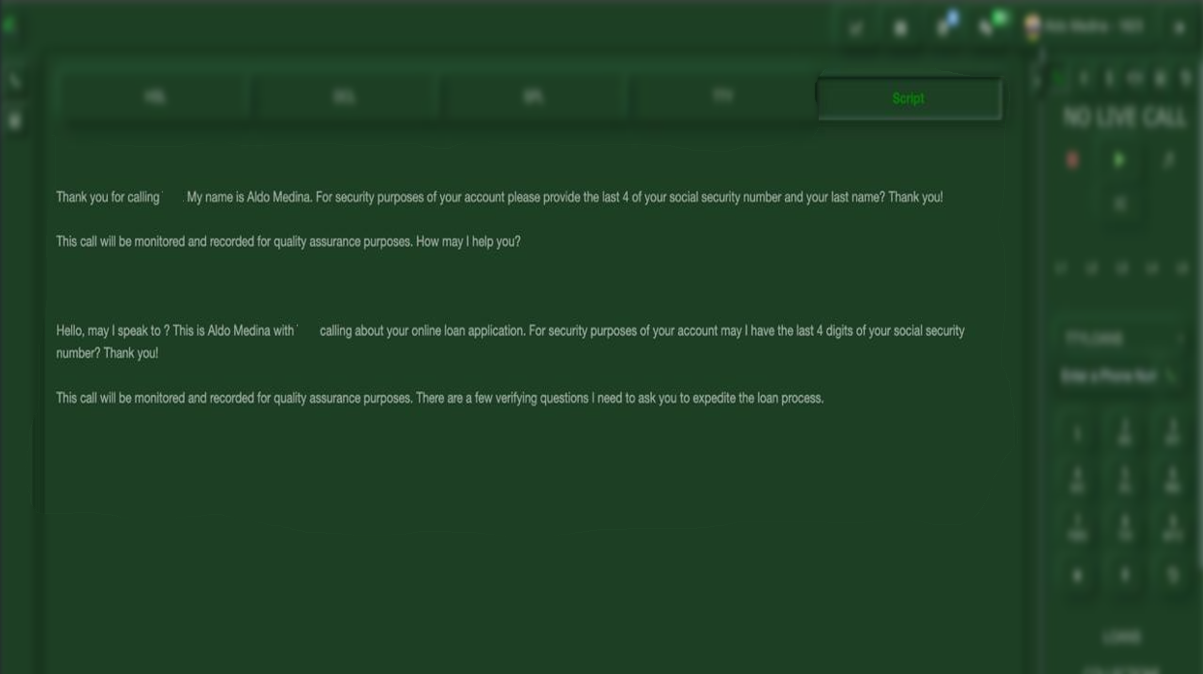
Script / CRM Panel
This section defines the tools available to agents during interactions, allowing them to access information and capture data efficiently.
- Dynamic Script
Provides adaptable call scripts that change based on the interaction, guiding agents through conversations. - Forms
Allows agents to input and manage data in real time during the call. - CRM Integration (iframe or native)
Enables access to CRM systems either through embedded views (iframe) or direct native integration within the platform.
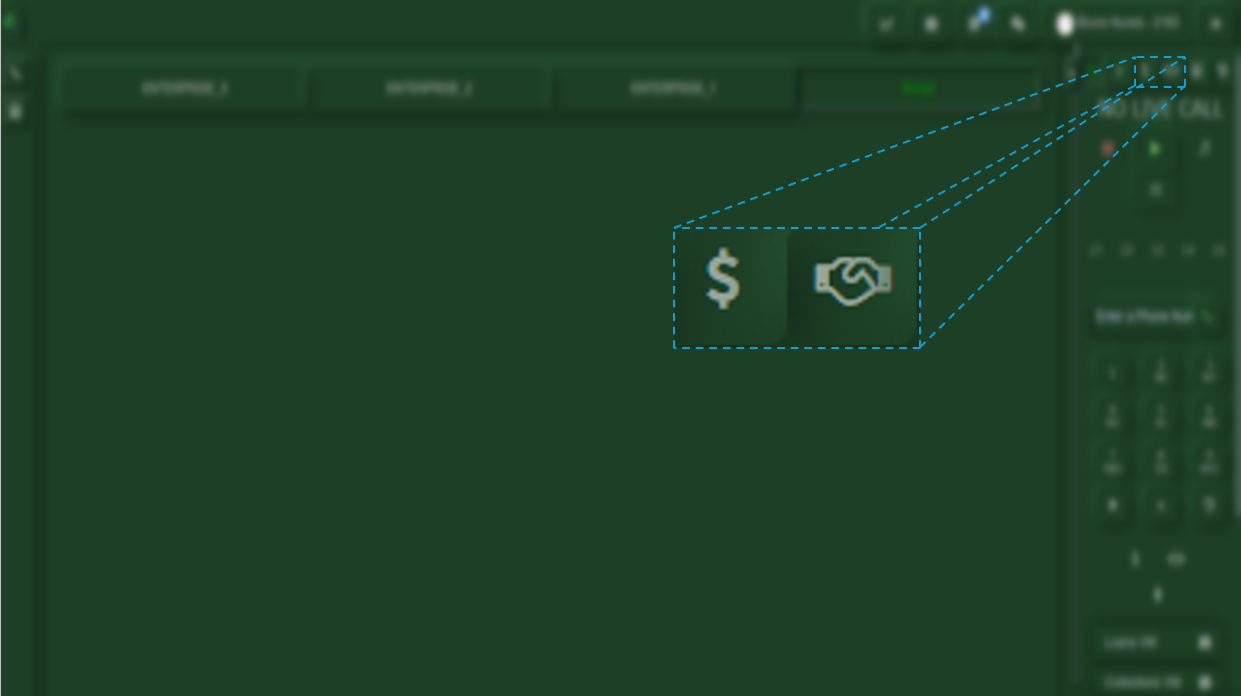
How to Transfer a Call
To transfer a call, the first requirement is to be on an active call. Then, in the upper right section—above the pause or resume call option—you will see two buttons: one with a dollar symbol and another with a handshake icon. To proceed with the transfer, you will see the available users, each with a phone icon next to them.
Notifications / Alerts
This section defines how the system communicates important information to users during operation.
-
- System Messages
Provide general information about system status, updates, or actions performed within the platform. - Campaign Alerts
Notify users about specific events or conditions within a campaign, such as performance issues or configuration warnings. - Errors
Inform users about problems or failures within the system, helping identify and resolve issues quickly.
- System Messages
Dashboard / Stats
This section provides key performance metrics that help monitor agent activity and campaign effectiveness. These indicators allow supervisors and agents to understand performance, availability, and overall productivity in real time.
Below are the main metrics displayed in the My Stats section:
- First Activity
Indicates the time when the agent performed their first action in the system (e.g., login, status change, or first interaction). - Last Activity
Shows the most recent action performed by the agent. This helps track current engagement and activity. - Login Time
Total time the agent has been logged into the system during the session. - Total Calls
Displays the total number of calls handled by the agent within the current session or selected period. - Break Time
Tracks the total time the agent has spent on break (intentional pauses such as lunch or rest). - Pause Time
Represents the total time the agent has been in pause status, meaning not receiving calls. This may include breaks or other non-available states. - Available Time
Indicates the total time the agent has been available to receive calls. - Talk Time
Measures the total time spent actively talking on calls. If no calls have been handled, this value will remain empty or at zero. - Calls Handled
Displays the total number of calls managed by the agent or campaign within a given period. - Conversion Rate
Indicates the percentage of successful outcomes (e.g., sales or completed objectives) compared to total calls. - Pause Time (Detailed)
Tracks how long agents remain inactive or unavailable for calls.